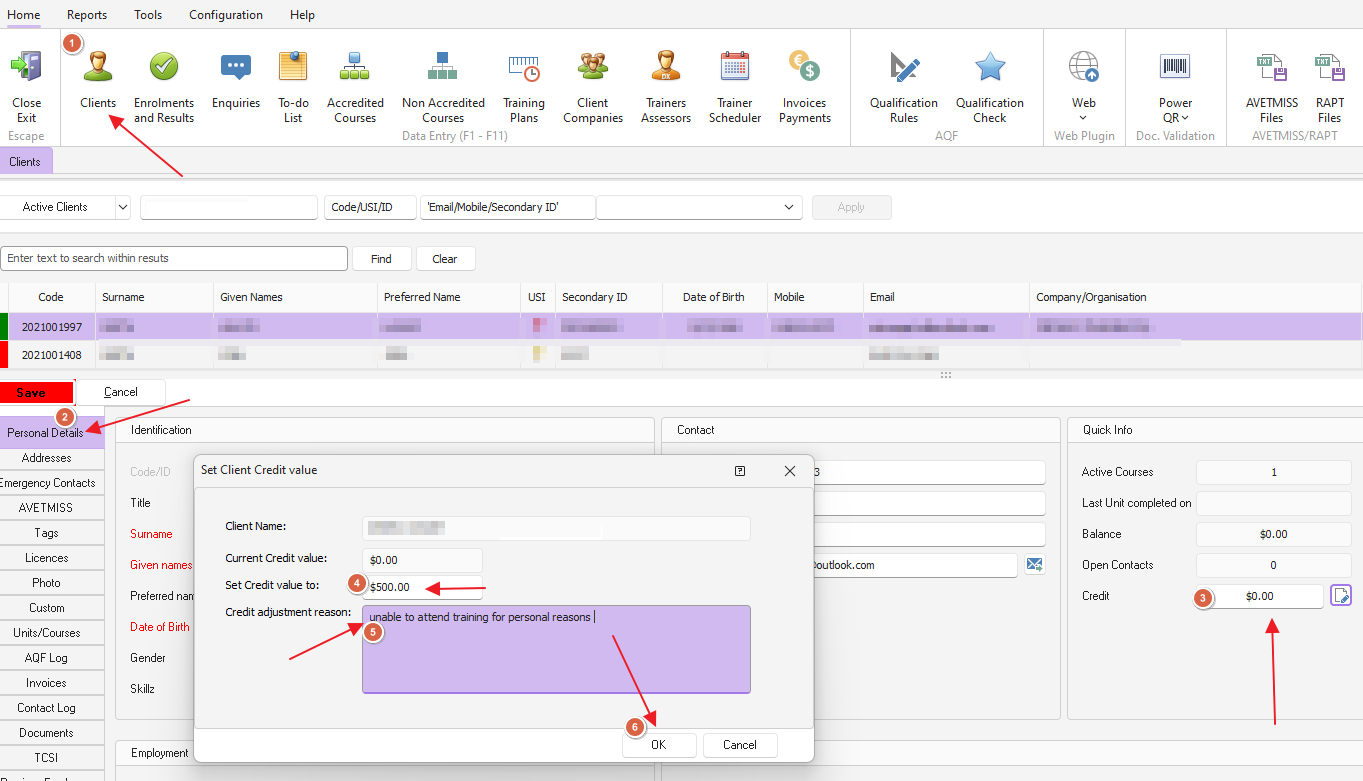
To add a client credit:
1. Look up client from the client area
2. From the personal details tab on client (as picture below) click on the icon next to the credit field
3. The window to set credit value will appear, enter details & click OK to save
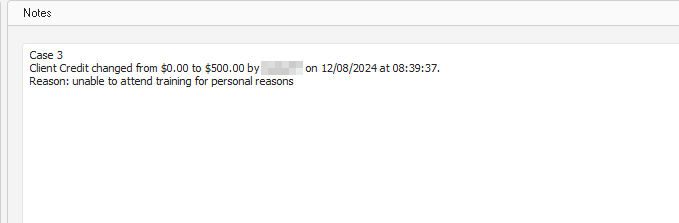
The details of the entry will appear in the notes area (as displayed below)
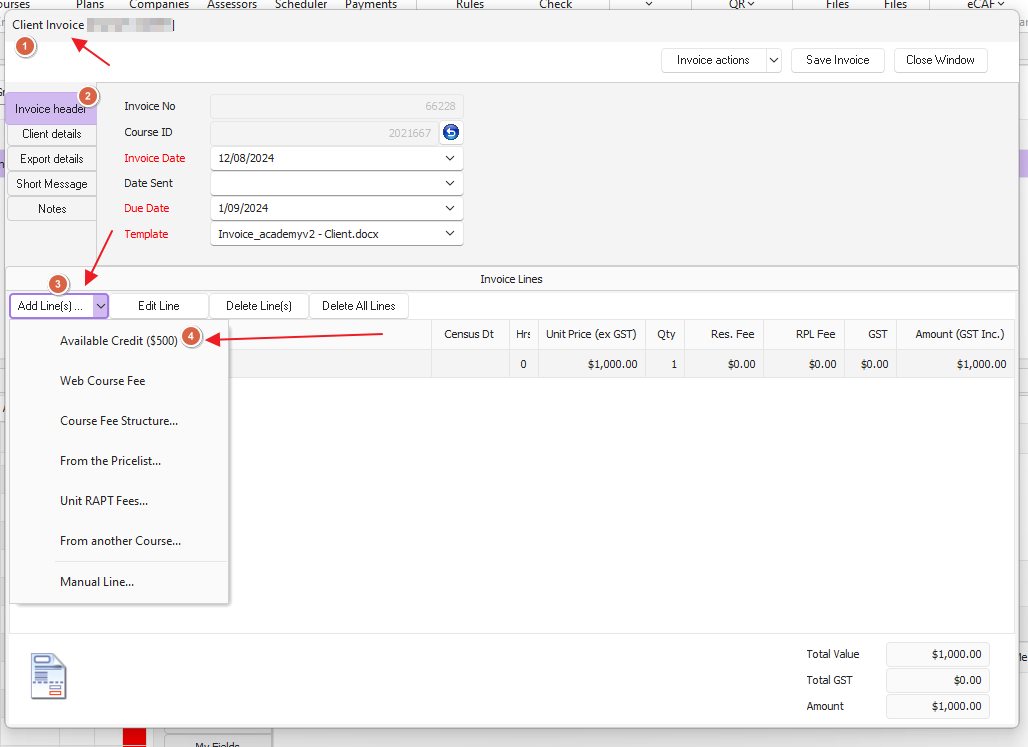
When an invoice is raised and if the client has a credit in the system, the option to use credit will be available to be selected
If the client does not have credit, on the add line(s) drop down : option will state "No credit available"
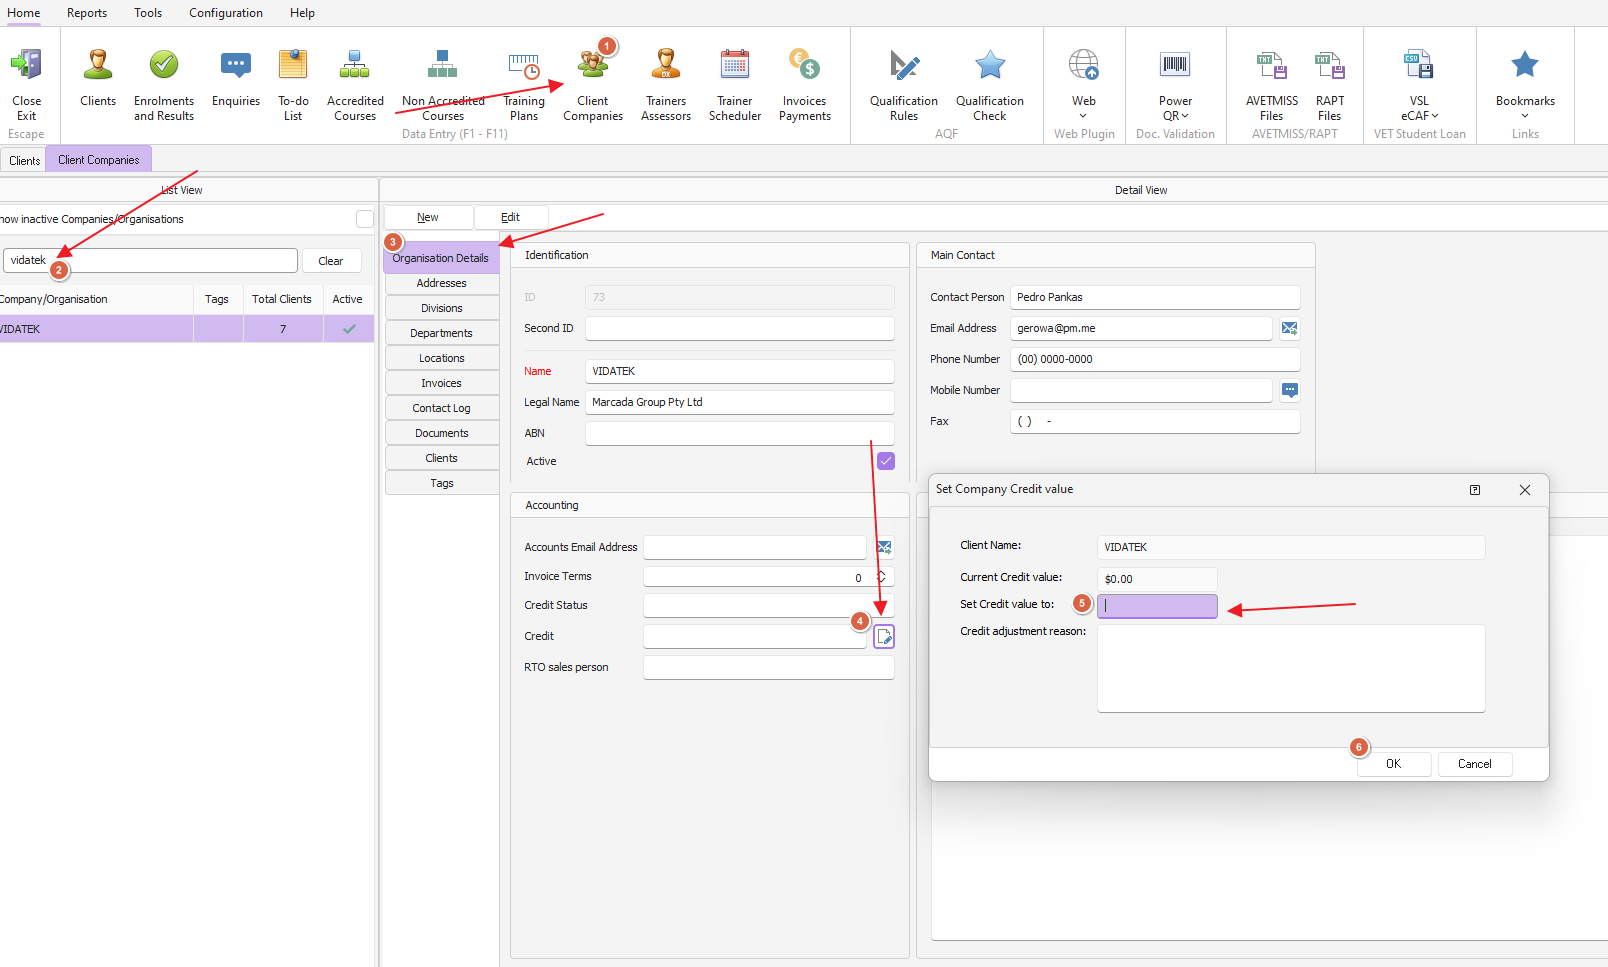
To add a company credit:
1. Look up company in the client company area
2. On the organisation details tab you are able to click on the credit field icon, set value of the credit and enter description
Click OK to save
3. Create company Invoice
- add course or enrolment lines to invoice from the add lines drop down
- repeat to select the available credit option from the add lines menu apply to invoice