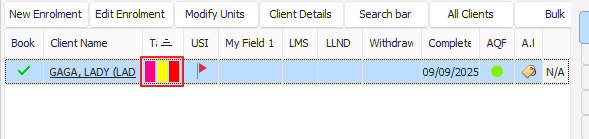
To utilise the clients tags in PowerPro, these will appear in the main area Enrolments and Results.
The tags are used as a client identification system
Once a client is tagged with a description, any course they are enrolled in you will see this specific tag
To create tags navigate to the Configurations Menu > Application Options > Clients tab
As pictured below:
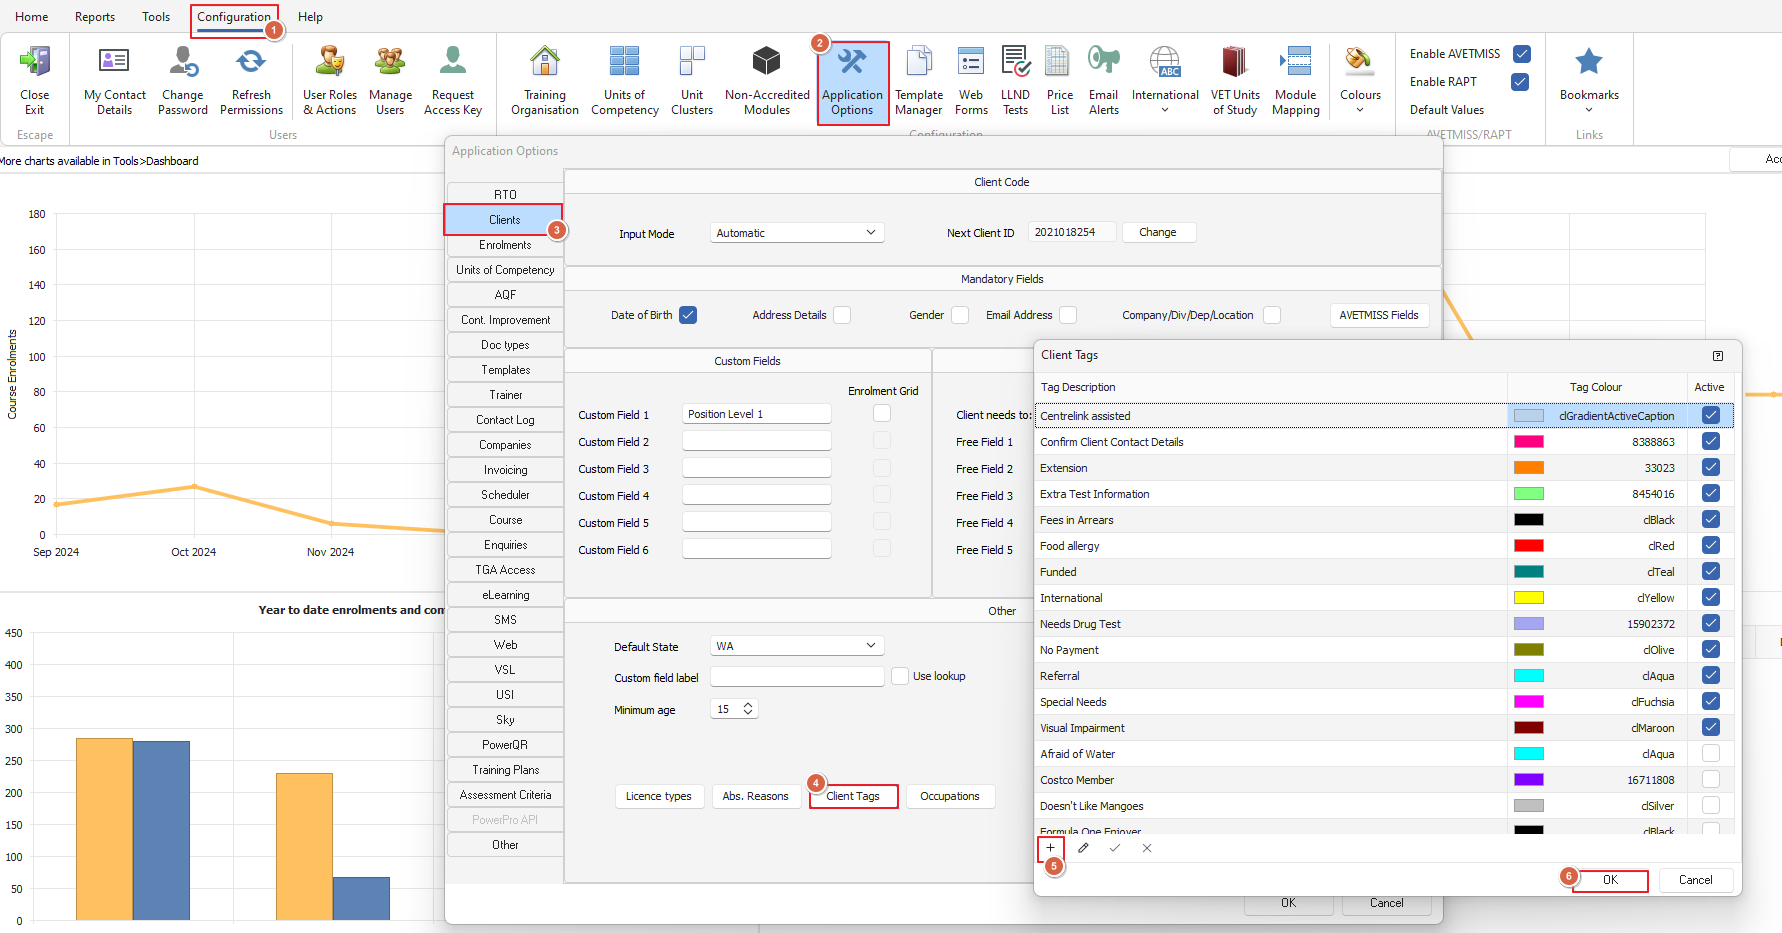
Click on the Client Tag button and once the window opens, click on the + to add your tag description and allocate a colour
To add multiple, repeat the same steps as many times as needed
Log out of PowerPro to set the changes
Once logged back into PowerPro proceed to a course that has clients that need to be tagged
Select the client and double click on the field labelled "Tag" as indicated below
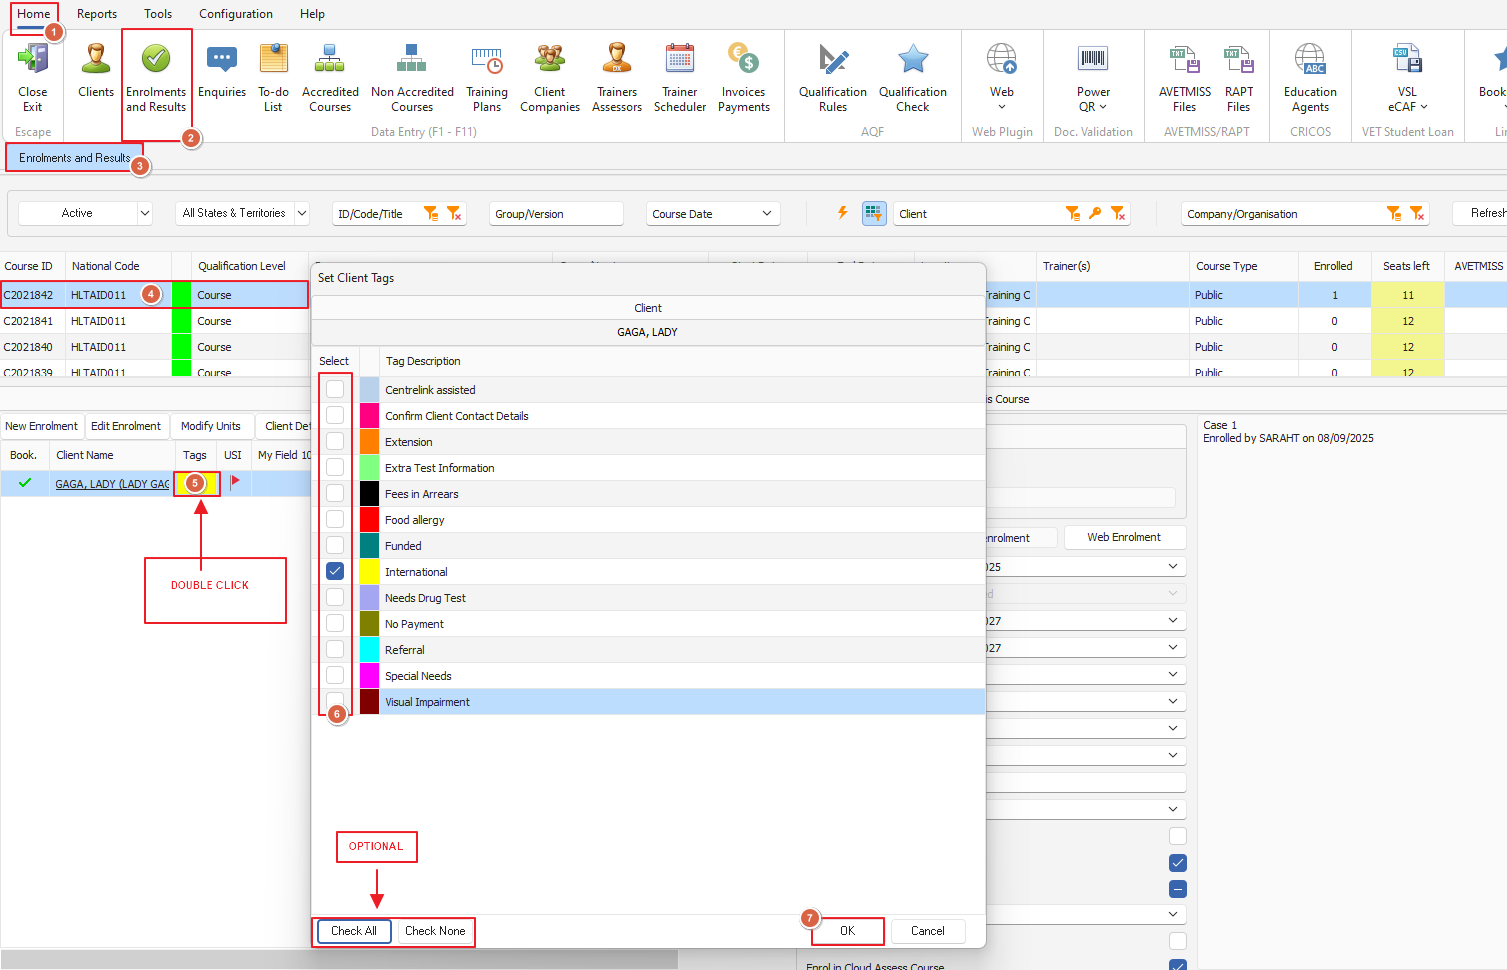
Select the tag/s and click ok
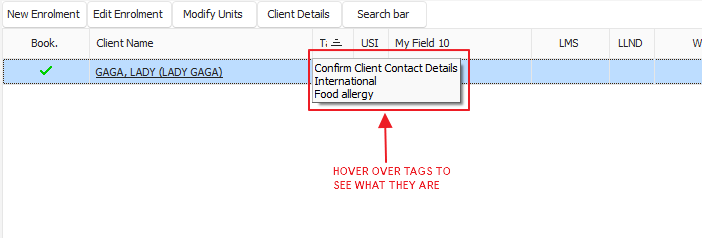
You will now see next to the client the Tag column with colour blocks, hover over the top to view tag description